Hello All!
The past few weeks a fellow graduate student from our collaborator’s laboratory, Wes, have been working to develop some immunofluorescence protocols for our laboratories. Immunofluorescence is a type of analysis that is often highlighted in many news stories because it’s pretty. If you have ever seen some neon green, red, pink, blue science-y looking pictures with a black background, there’s a solid chance it’s immunofluorescence. As an undergrad I was so amazed by these pictures (and even now I must admit they are cool looking). However, I realize not everyone knows how this works, in my relentless quest for better science communication, I am going to try how this analysis works.
So step one. For immunoflouresence to work you need antibodies. Perhaps you’ve heard of these little guys. They are present in all of us (unless you have no adaptive immunity which is a different issue). These guys are made by the immune system to help find different pathogens in our blood and serve as a signal to the immune system to get up and do stuff. When they see a pathogen in the blood, they bind of a very specific part of the pathogen and attach the pathogen essentially telling the rest of the immune system “come destroy this guy”. Antibodies essentially work because they have a small portion on them that will bind very strongly to pathogens. Importantly this small portion can vary a lot, which allows for antibodies to bind to a very wide variety of pathogens or for our purposes, allows for antibodies to bind to a wide range of important proteins.
Anyway, now let’s talk about pretty stuff. Our lab focuses primarily on muscle, so most of this post will be about muscle, but this works with lots of different tissues. When we collect muscle tissue we freeze it very quickly and then use a very specialized piece of equipment to slice the muscle super thin and place those very thin slices on the microscope slides On our thinly sliced muscle we have proteins that are specific to what we want measure (for example, different proteins identify different types of muscle fibers, such as our slow endurance fibers, our fast powerful fibers, and our in the middle fibers). These proteins contain those very specific regions that specific antibodies can bind to (essentially these portions on the antibody and the protein are friends and want to hold hands). We place some antibodies on this muscle and the antibodies bind to the proteins we are interested in measuring, this is called the primary antibody. After adding the primary antibody, we then add an additional antibody, this is called the secondary antibody. The secondary antibody in this case is specially designed to fluoresce (essentially glow in the dark) when exposed to certain wave lengths of light. The secondary antibody binds to the primary antibody and allows for us to in directly measure how much of our original protein is present in our sample. This whole process is defined in a picture below, this process is used by many different scientists and laboratories for measuring a wide variety of proteins of interest. In our little example, we fiber typed different type of muscles, which by doing so gave us pretty pictures of muscle with lots of different colored fibers! We see different color distributions because different muscles have different fiber compositions because some of our muscles need to be really strong and fast to contract (such as many of our quad muscles) whereas others need to be really slow to contract and not easily fatigued (such as the muscles in our abdominals and back that allows up to stand up straight).
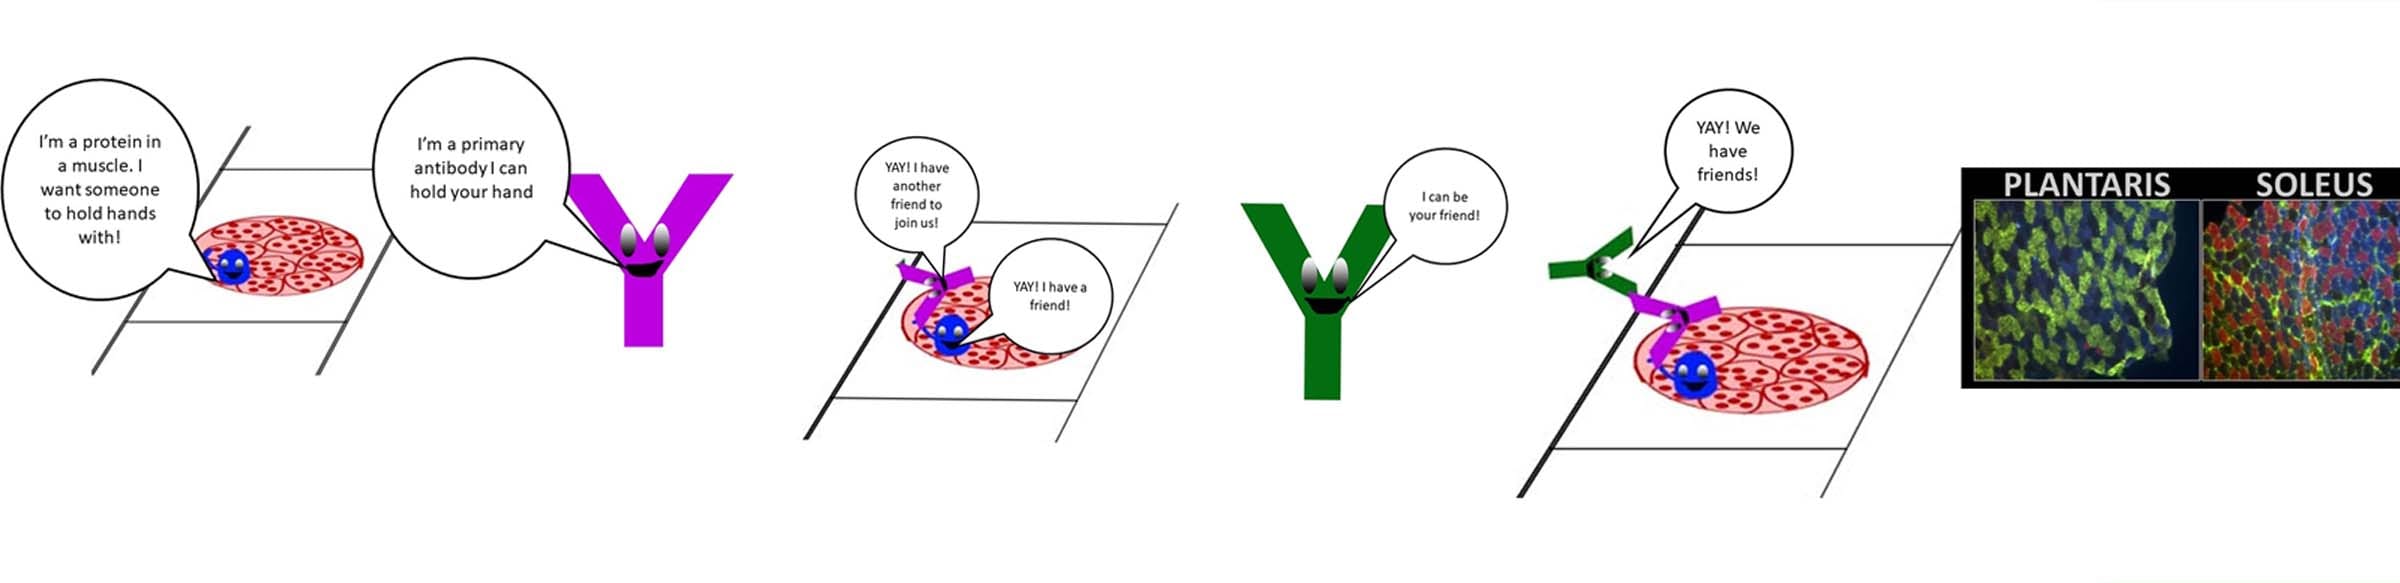
Immunofluorescence! Essentially just a lot of antibodies holding hands with a protein.
Hope that was at least somewhat interesting and informative! We’ve been quite busy, with two papers accepted within the past week and an upcoming conference in Kansas City, so I will be posted about those soon!
Until then keep on #sciencing!
Cheers,
Megan